Tachometer
for a Sherline lathe
This
article assumes you have read Sherline Lathe
Infrastructure
I
decided to add a tachometer to my machined base Sherline
lathe when I was changing the lathe to use a stepper motor drive. (See separate article.) I found a very inexpensive solution.
I
used a tachometer system that included a NPN Hall proximity switch sensor and a
display for under $20. (See parts list
at end.)
I
drilled a 1/8 diameter hole in the inner pulley on the Sherline
headstock and glued a 1/8 inch diameter by ½ inch long
magnet in it. I never used the inner
pulley when I used the Sherline motor so this did not
interfere with normal operation. Since I
also switched to stepper motor drive for the lathe (see separate article) the
pulley was not used at all. The hole is just deep enough so that the tip of the
magnet is even with the sides of the pulley.
I used CA glue that claims to be designed to hold metal. (See figure 1.)
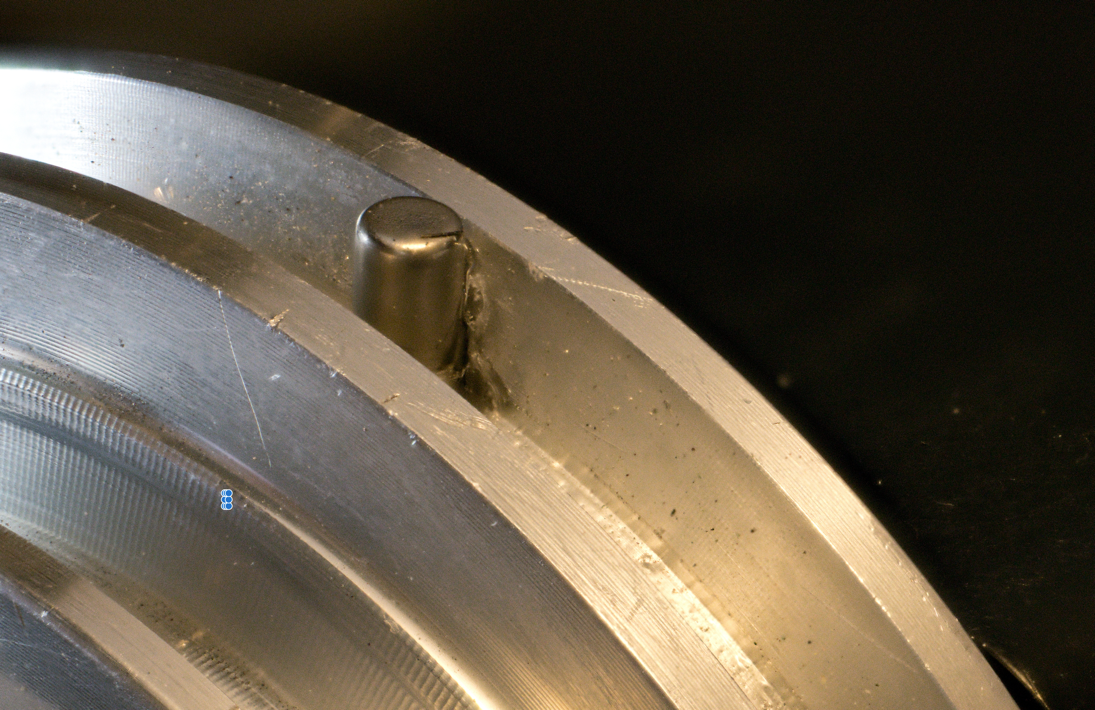
Figure 1: magnet
installed in pulley
I
then made a small aluminum bracket to hold the sensor and mounted the sensor and
bracket on the side of the headstock pillar on the lathe base. I drilled and taped to 6-32 holes into the pillar
to hold the bracket. See figure 2.
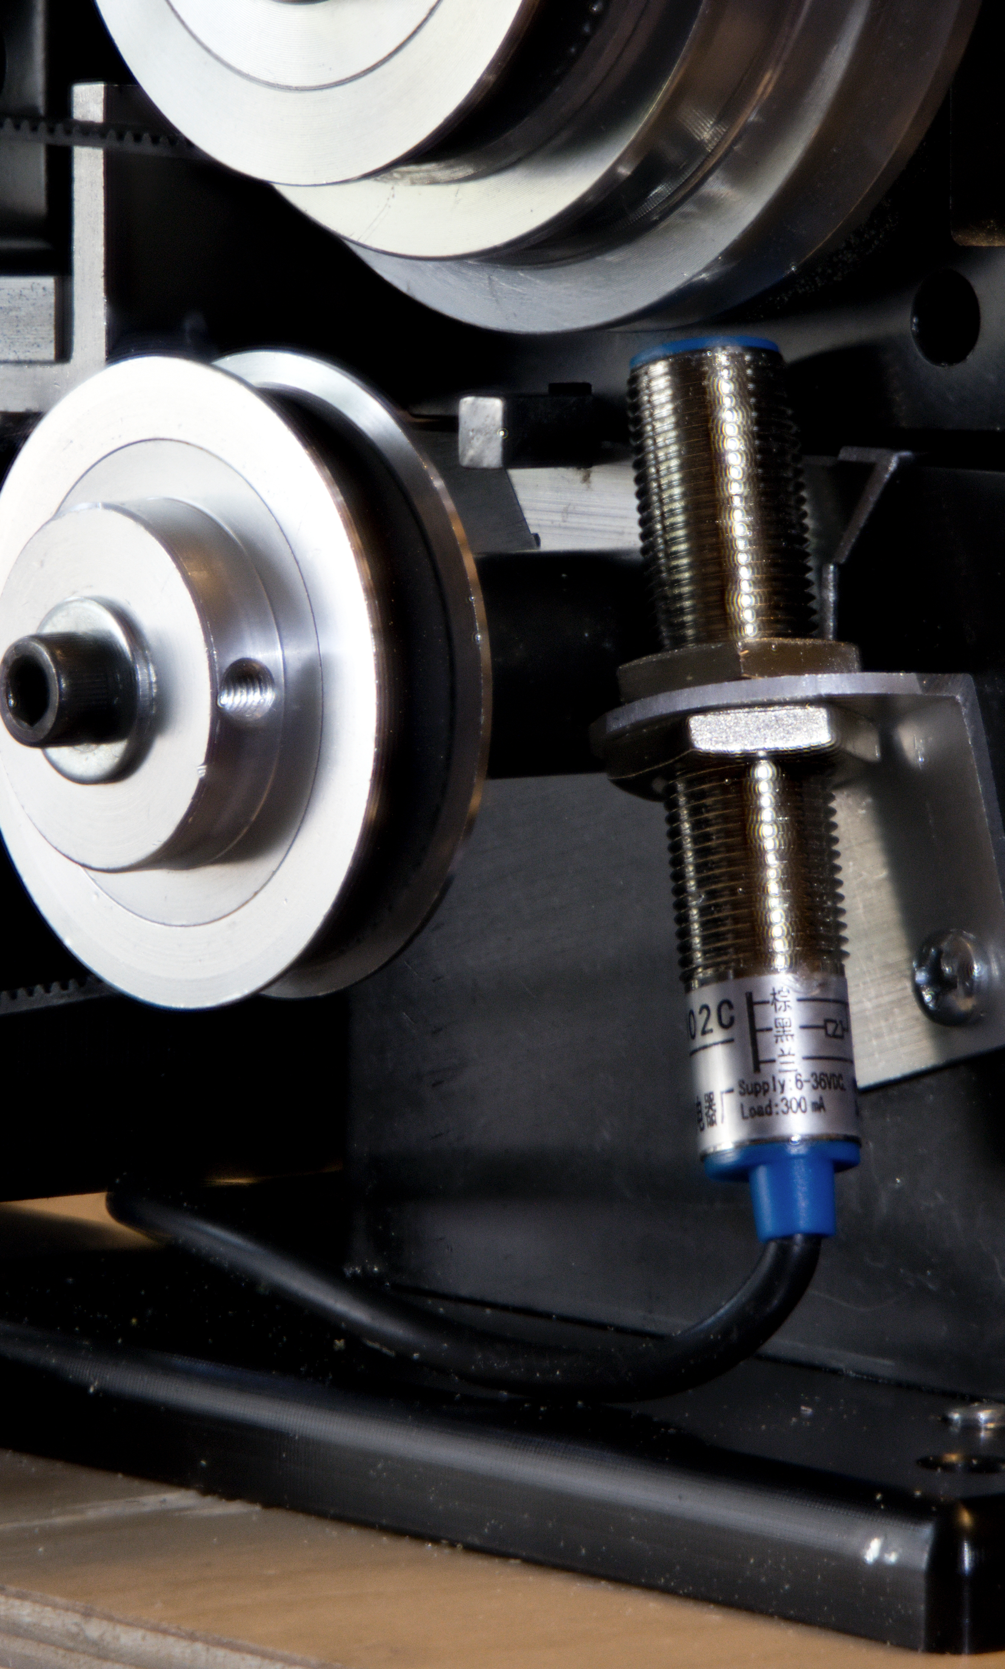
Figure 2: Hall
effect sensor installed
I
drilled a hole in the lathe’s plywood base and ran the sensor cord through the
hole and connected the wires in the cable to a barrier strip that I had mounted
in the base. I then connected the wires
from the tachometer display module to the barrier strip. (I had to extend three
of the wires by soldering on short pieces of wire and protecting the connection
with shrink tube.) Running the cord under the plywood base ensured that the
cord would not trap chips and make cleanup harder. I then mounted the display on the control
module bracket under the lathe bed. (See
figure 3.)
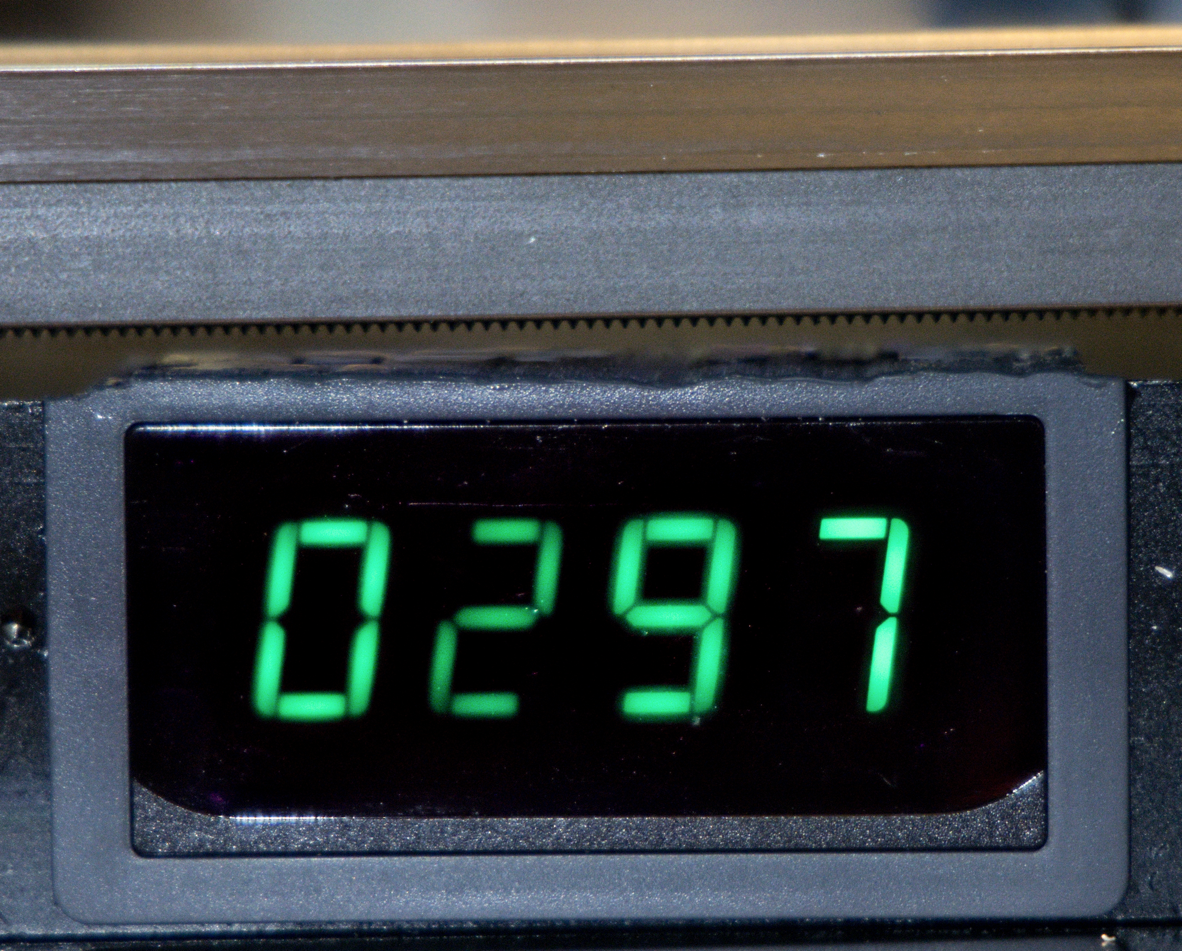
Figure 3:
tachometer display installed
The
tachometer system that I used requires 24-volt DC power to run. In my case I had a 24-volt DC power supply connected
to the lathe for the stepper motor drive, so I just connected the tachometer
power leads to it. If you do not have 24
vdc handy you can get any one of a number of small power supplies, for
example.
There
are also models of the tachometer kit
that take 110-230 volts
AC directly, but that seems a bit tricky to use safely.
The
total cost, even if you have to get a separate power supply, is less than $50 –
easily worth the price.
Parts
list
Copyright
Ó 2024 Scott
Bradner
2024-09-05